How to repair the neck tilt joint of Sony Aibo ERS-7 robot
This document is intended to help you repair the neck tilt joint of a Sony Aibo ERS-7 yourself.
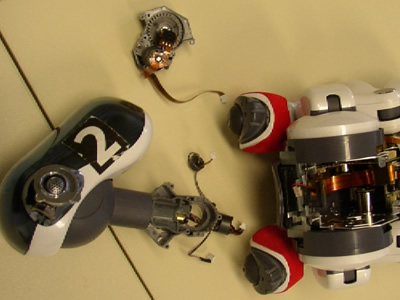
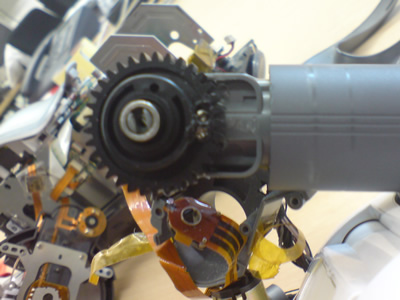
The weak point of that joint is a (black) gear wheel that is barely mounted to the neck limb.
The grey plastic of the frame quite often crumbles away after some strains.
Sony Aibo Clinic would exchange a complete head with such a defect. That's very expensive and maybe take some time until you get your robot back again. Another advantage of the method shown is, that a further defect was never observed with repaired neck joints. Anyway you should also be aware of the risks of the procedure. Don't do it, if there's warranty left on your device - otherwise you will void it. Make sure you carefully read the instructions, get the appropriate tools and work space. Although it's possible to follow the procedure on your own, it's recommended to ask one person to assist - especially if it's the first time you do it. We are not responsible for any damage caused by following this guide. You're acting on your own risk! If you have doubts, don't do it. If you do it, have no doubts! ;-) You'll need: also useful: - soldering iron
The fotos also might be very useful, when you're reassembling the robot ;-)
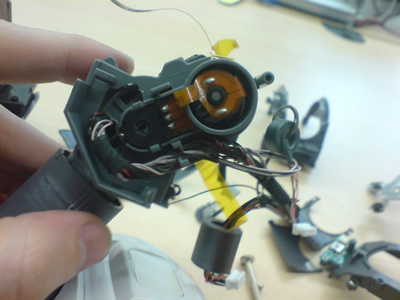
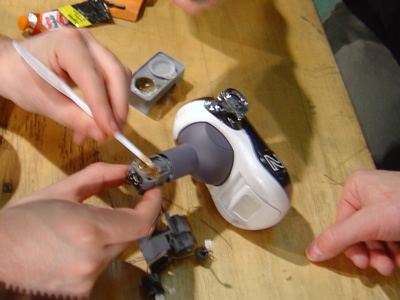
First you have to remove the Aibos body case and should also remove the front legs. Then it's recommended to put all screws and parts you removed so far in a plastic box and away of your working space.
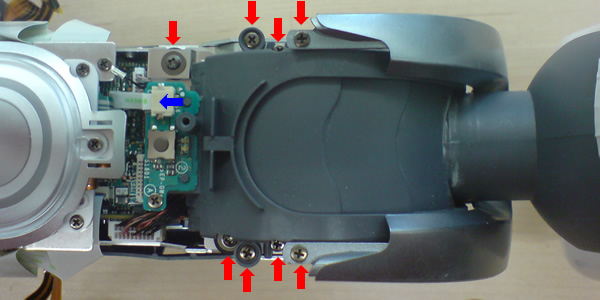
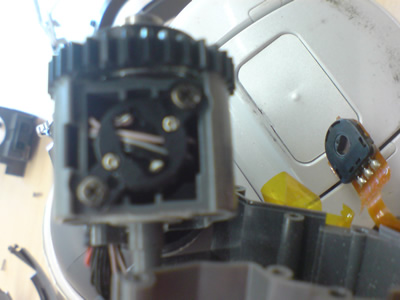
Remove the power button using a small screw driver to lift the nozzle. Remove screw and covering.
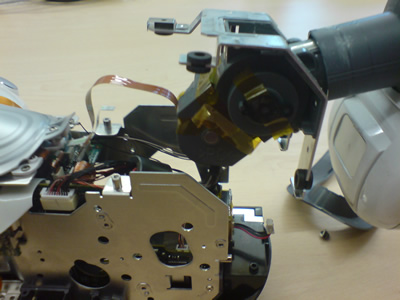
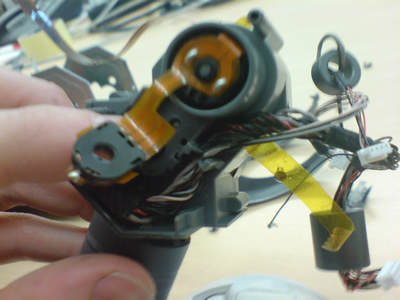
Remove the marked screws and the flatcable. You can just pull it off carefully.
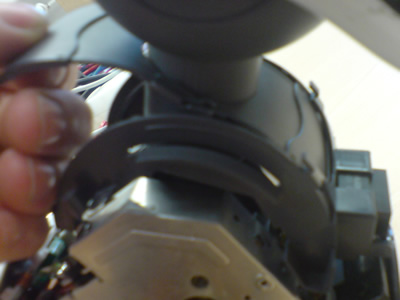
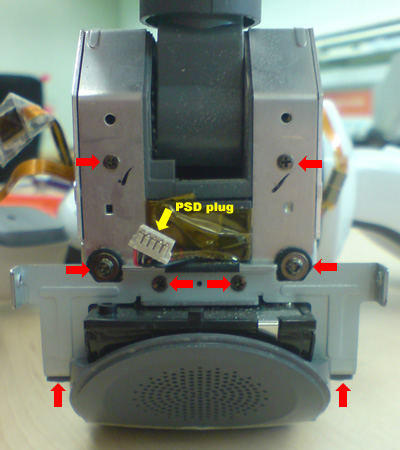
Carefully remove the shutter. Don't brake the bracket! Unplug the PSD sensor (plug shown on next picture).
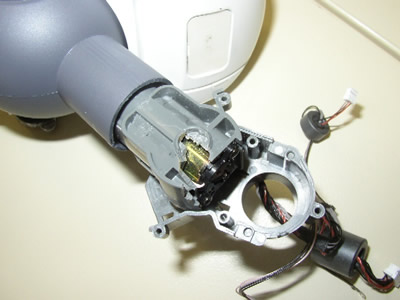
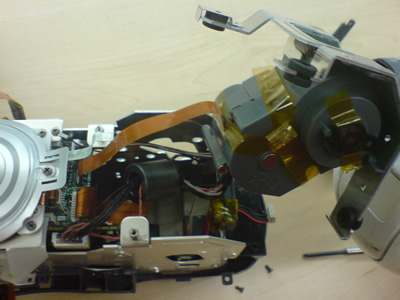
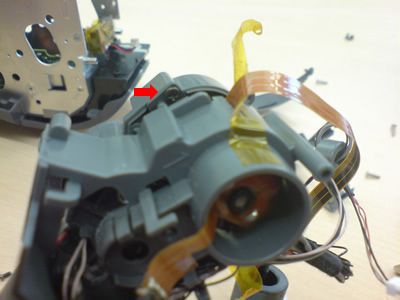
Remove plugs and screw if not done already. Lift neck tilt metal case at the back side over the thread flanges.
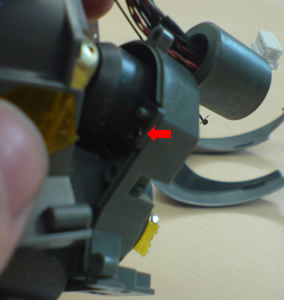
Lift case over the screw sockets at the front side. Remove head and all plugs leading from body to head if not done already.
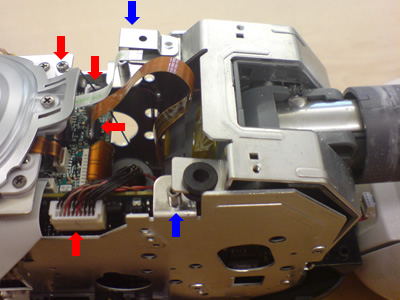
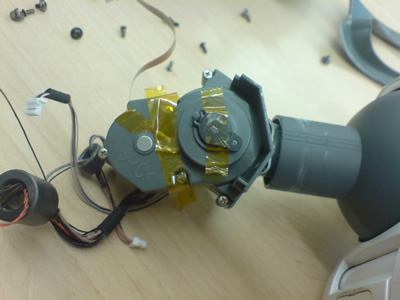
Remove the tape and the 5 screws of the plasic case.
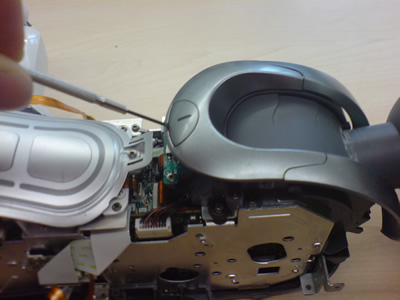
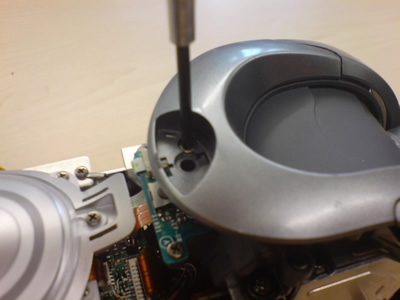
Carefully remove the potentiometer. Use a small screwdriver. Lift the orange cable - not only the plastic elements.
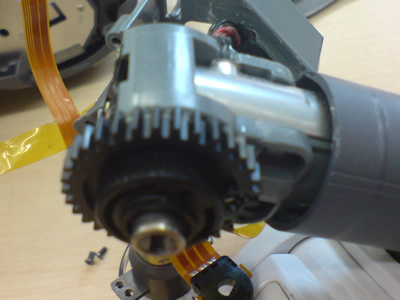
Remove the two screws of motor fixture. Don't lose the fixture rings (small black plastic rings). Imortant:
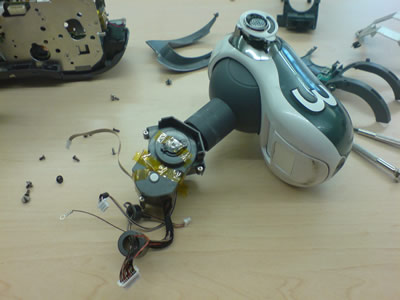
Free the gear wheel and the neck tilt from dirt and plastic dust. Put the wheel and the neck tilt together and check if it fits. Find the position to glue it.
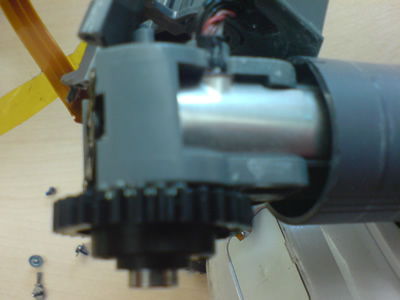
Put the glue to the neck tilt and the gear wheel according to the guidance of the glue you're using. Think again of adding screws but don't spoil your soldering iron with adhesive. Work carefully - probably you will only have one chance to glue the gear wheel - it shouldn't ever get loose again!
Glued gear wheel - additionally fixed by screws.
Reassemble everything. After adding the legs you can do a test run and see if the head is working fine or if you missed a plug or something. Don't be shocked. Although this might look frightening in the first place, it's a common procedure with some RoboCup teams and several robots have already been repaired successfully that way. You're welcome to ask any questions on this method and also send pictures of your work and defective parts. Jörg Zimmer |